Introduction
Maxillary defects may occur due to congenital malformations or acquired defects, such as trauma or ablative surgery in oral cancer. They can result in oronasal communication, which may cause masticatory and deglutition difficulty, impaired speech, and facial disfigurement.1 The prosthodontist plays na important role in rehabilitating such defects since reconstructive surgery may not always be indicated.2
The prosthetic rehabilitation for total and partial maxillary defects implies separating the oral and nasal cavities to allow adequate deglutition and improve speech. Supporting the orbital contents may also be important to prevent enophthalmos and diplopia, and supporting the soft tissues promotes an acceptable aesthetic result.1,3
A prosthesis used to close a maxillary defect in a dentulous or edentulous patient is called an obturator.1 The obturator has one bulb portion, which is the part that accommodates the defect area, improving seal and retention. Restoration of significant oronasal defects requires a larger prosthesis, making it heavier. A heavier prosthesis applies higher stress on the underlying tissues and causes discomfort to the patient.4 Furthermore, with a heavy obturator, gravity is a dislodging factor that affects the prosthesis’ stability and retention, especially in edentulous patients with no implant retention. One way to reduce the obturator’s weight is by making a hollow bulb obturator.5 A previous study showed that hollow design reduced the weight of the obturator prostheses by up to 33%, depending on the size of the defect.6
There are two types of hollow bulbs: open and closed.1 Both types of obturators are lightweight prostheses the patient can easily tolerate. However, open hollow bulb obturators often collect mucous, food, and fluids, requiring numerous cleanings and potentially leading to malodor and increased weight. On the other hand, closed hollow bulb obturators do not pool moisture while still extending adequately into the defect. Although a closed hollow obturator has many advantages, the complexity of its fabrication prevents it from being widely used. Thus, the open hollow obturator is constructed more frequently.1
Various materials and techniques have been described for closed hollow obturator fabrication, including dissolvable materials such as sugar7 and ice,8 which work as spacers to create the bulb chamber. After resin polymerization, the sugar or the ice is drained through a drainage hole. Generally, this hole is posteriorly sealed with auto-polymerizing acrylic resin, becoming a potential site for leakage and discoloration. An alternative technique that does not involve emptying the bulb is the construction of an open hollow bulb obturator and a separate palatal part or canopy cover, which are subsequently joined using auto-polymerizing acrylic.9 Other techniques have been described to avoid repairs with auto-polymerizing acrylics, such as the double-flask technique involving two flasks with interchangeable parts.10 In this technique, the entire process is carried out in a flask with thermo-polymerizing acrylic resin. However, it requires extra laboratory steps and highly skilled laboratory technicians, being time-consuming and technique-sensitive.
Current innovations and technology developments in computer-aided design and computer-aided manufacture (CADCAM) allow the fully digitalized design and manufacture of removable dental prostheses.11 Using 3D optical shaping equipment with rapid prototyping techniques offers significant advantages by allowing the fabrication of single-piece closed hollow bulb obturators with no joints, thereby eliminating the limitations of traditional fabrication.12,13
This technical report aims to describe a digital laboratory workflow to fabricate an obturator with a closed hollow bulb using an optical 3D scanner, design by a software program, and rapid prototyping manufacturing technology.
Description of the technique
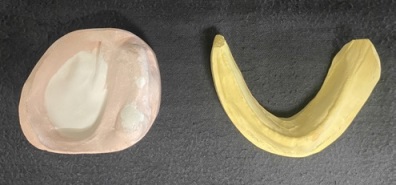
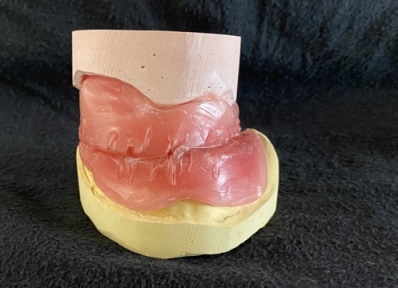
1. Make a definitive impression of the edentulous maxilla and opposing jaw and create definitive casts (Figure 1). Fabricate record bases and occlusion rims to articulate the definitive casts (Figure 2).
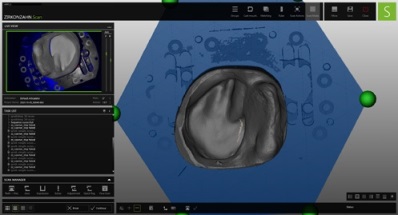
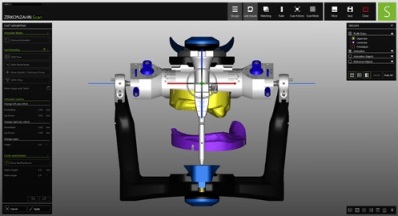
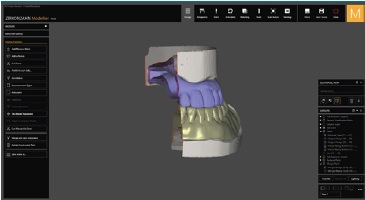
2. Scan the definitive casts and maxillomandibular relationship using a dental laboratory scanner (S600 ARTI, Zirkonzahn, Italy) and import the digital files to a comercial CAD software program (Modellier by Zirkonzahn, Italy) (Figures 3, 4).
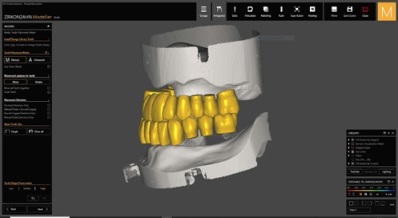
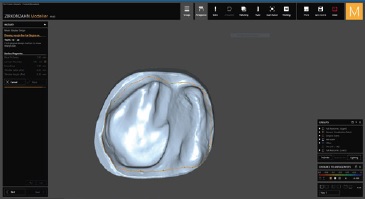
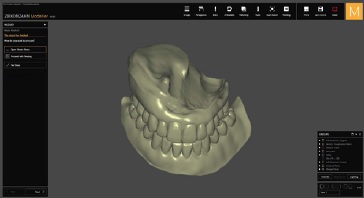
3. Select artificial teeth from a digital library (AIDA, Zirkonzahn library, Italy), according to the lines drawn on the wax rims, and set them using the same software (Modellier by Zirkonzahn, Italy) (Figure 5). Then, draw the limits of the obturator (Figure 6) and design the dentures using the same CAD software program (Figure 7).
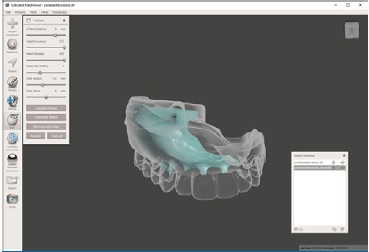
4. Export the obturator in an STL file format to the Autodesk Meshmixer software and design the hollow obturator part using the “Hollow” function in the Edit menu. Extract the data for the entire obturator part using the “off set distance,” leaving a 3-mm thick outer border (Figure 8, 9).
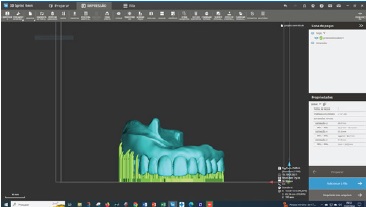
5. Export the obturator in an STL file format and prepare to manufacture the obturator additively with the light-polymerizing micro-filled hybrid resin (C&B MFH, Nextdent, Netherlands), color N1.5, and a 3D printer (Nextdent LCD1, Nextdent B.V., Netherlands). Before printing, define the support pins (number and location) automatically (Figure 10).
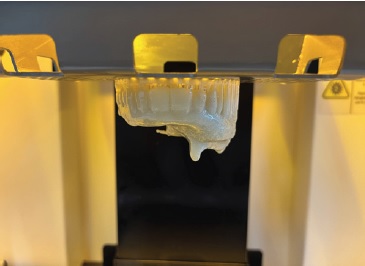
6. After printing, remove the prosthesis from the printer (Figure 11) and ultrasonically clean it with 99.5% isopropyl alcohol (AGA, Portugal) for 15 minutes.
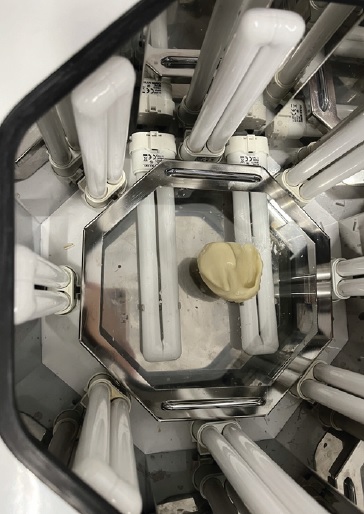
7. After cleaning, expose the dentures to a final photopolymerization in an LC-3D Print Box (Nextdent B.V., The Netherlands) for 10 minutes (Figure 12).
8. Cut back the support structures. Then, cover the gingival area with a thin layer of pink auto-polymerizing acrylic (Probase Auto, Ivoclar Vivadent). Pigment each tooth individually with a photopolymerized acrylic (Vita Akzent LC, Vita Zahnfabrik, Germany) for a more natural appearance and better aesthetics (Figure 13).
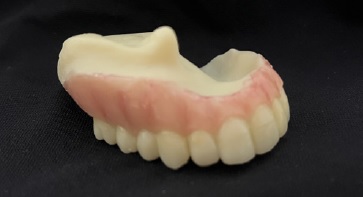
Figure 13 Obturator prosthesis with a layer of pink acrylic on the outer face of the prosthesis simulating natural gingiva
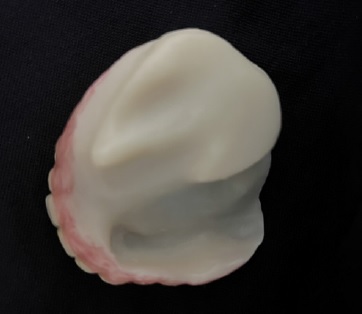
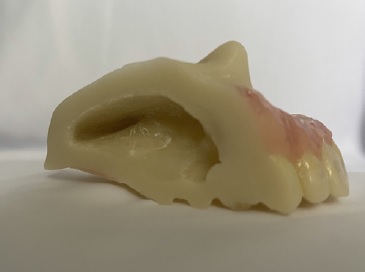
9. Finish and polish the obturator prosthesis for delivery (Figure 14). When testing this technique, after completing the obturator manufacturing process, it was cut to verify that its interior Figure 3. Digital maxillary cast. was hollow (Figure 15).
Discussion
This technical report describes a digital laboratory workflow to fabricate a 3D-printed obturator prosthesis with a closed hollow bulb. Many traditional methods have been proposed to fabricate an obturator with a hollow bulb.7,8 However, these techniques are complex and pose issues, such as an uneven thickness of the hollow space and a non-uniform prosthesis thickness for the obturator. It may also be challenging to remove materials inside the bulb through the small holes drilled in the prosthesis after processing, and there are limitations to auto-polymerizing acrylic repairs.13
Although CAD-CAM technologies allow for the digital designing and manufacturing of obturator prostheses,13,14 there is currently no effective way to fabricate the closed hollow bulb obturator with the commercially available dental digital design software programs. An alternative program (the Autodesk Meshmixer) is required to overcome these limitations. Additionally, the machines and software programs used are expensive and require extensive training and post-processing for better aesthetics. 3D printing of the entire prosthesis may offer some advantages, but it has the aesthetic limitation of producing a prosthesis in only one color. Dental pigmentation and pink resin application to the vestibular flap is a procedure already described that offers adequate aesthetics.15


